Press "Enter" to skip to content

Brainscraps.net

Meet Pip

Pip, our new kitty fren!

It’s been a long time since I’ve written a purely personal blog post anywhere, and I’ve never done one here, so here goes:

As my Bluesky followers know, we bid farewell to Mosey on March 14 of this year, leaving us with just Ruby. She had been restless for some time, even before Mosey’s passing, constantly demanding attention. I remembered that, as a formal feral in a cat colony, Ruby has never lived without another cat, and I suggested to bitprophet that we adopt a new friend for her sooner rather than later.

Pip close up. We considered a David Bowie-inspired name for awhile because of his facial markings.Near the end of March, we visited a shelter our cat-specialist vet recommended, and picked out a cute lil’ guy. Unfortunately, said lil’ guy was a nervous wreck, and as such, they weren’t able to wrangle him into a carrier that day. We came back early the following day, brought him home, and put him into isolation, as one is supposed to do at first when introducing a new cat to another. Unfortunately, after contacting the vet with New Guy’s info, it seemed that he hadn’t been properly quarantined for FIV and feline leukemia, so we spent the next month keeping him locked away in the bedroom, not allowing Ruby any sort of contact.

Pip and Ruby staring out the back door. Frens!After New Guy’s successful quarantine, after which he was found to be clean, we finally began the process of introducing him to Ruby. She wasn’t exactly accepting of him at first, and he acted as suspicious of her as he did of us back in early April—seriously, I’d never been hissed at by a cat so much in my life. Ruby got her bullying out of her system, and New Guy, which we had properly named Pip, came out of his shell. As we worked to get him acclimated to the rest of the house, Ruby and Pip’s relationship improved further, and now they’re hanging out with each other and playing together on a daily basis.

Pip has been a fun little guy so far, though he loves to eat a little too much, and we have to watch his weight. He loves kicky toys, and digs in a litterbox like an excavator. He’s retained a fair amount of nervous energy, so tasks like trimming his claws can be a bit of a pain. Still, he’s a lovable new addition to our little family. I hope you’ll enjoy him too, in the pictures we post online going forward.

Build Club: Revisions (Part II)

Springtime tends to be rough for me these days, with both hay fever and insomnia occurring regularly. That said, I tend not to get a lot done during this season. Then there’s my ongoing RPG Challenge, which is my big hobby focus for the year. Anyway, those are the main reasons why I was a little late in wrapping up HGBF Transient Gundam Glacier, in addition to the usual challenges of painting light-colored panel lines on dark pieces. I did end up mixing and using a blue I really liked, but didn’t get around to finishing until June 5. Here’s a couple more shots:

Two more shots of Glacier, including a full body view

The blue panel lining looks wonderful and was worth the effort. Also note that I only assembled one of the spears, partly because I forgot the second one wasn’t a spare, and partly because dual-wielding spears is kinda silly. Getting rid of nub marks on dark-colored pieces is ever a pain, but at least I was able to hide a fair number of them, thanks to Bandai’s smart design. However, I did end up with some scratches in a few spots, and the clear parts were somewhat finicky to trim. The biggest surprise of this kit were the clear parts on either side of Glacier’s head. They don’t have pegs, or any other kind of obvious attachment mechanism, but they stay in place without cement.

Other than the painting, I didn’t do anything fancy. If I wasn’t so constrained on time (and/or hadn’t decided on such an offbeat approach to panel lining), I might’ve been attempted some weathering effects.

Despite that, Transient Gundam Glacier was a good refresher to kick off what I hope is another productive summer of plamo building. I’ve already started on my next kit, the armored mode version of Yin Hu, whose more casual outfit I built last year. As for the next Build Club theme, I’m ready for whatever it is!

Build Club: Revisions (Part I)

When the Spring theme for Build Club was announced, I looked over my backlog, picked out a kit, looked at the instructions for said kit, and changed my mind. On and off, this process took about a couple of weeks. Anyway, I’ve started working on the kit I finally settled on. It is…

HGBF Transient Gundam Glacier

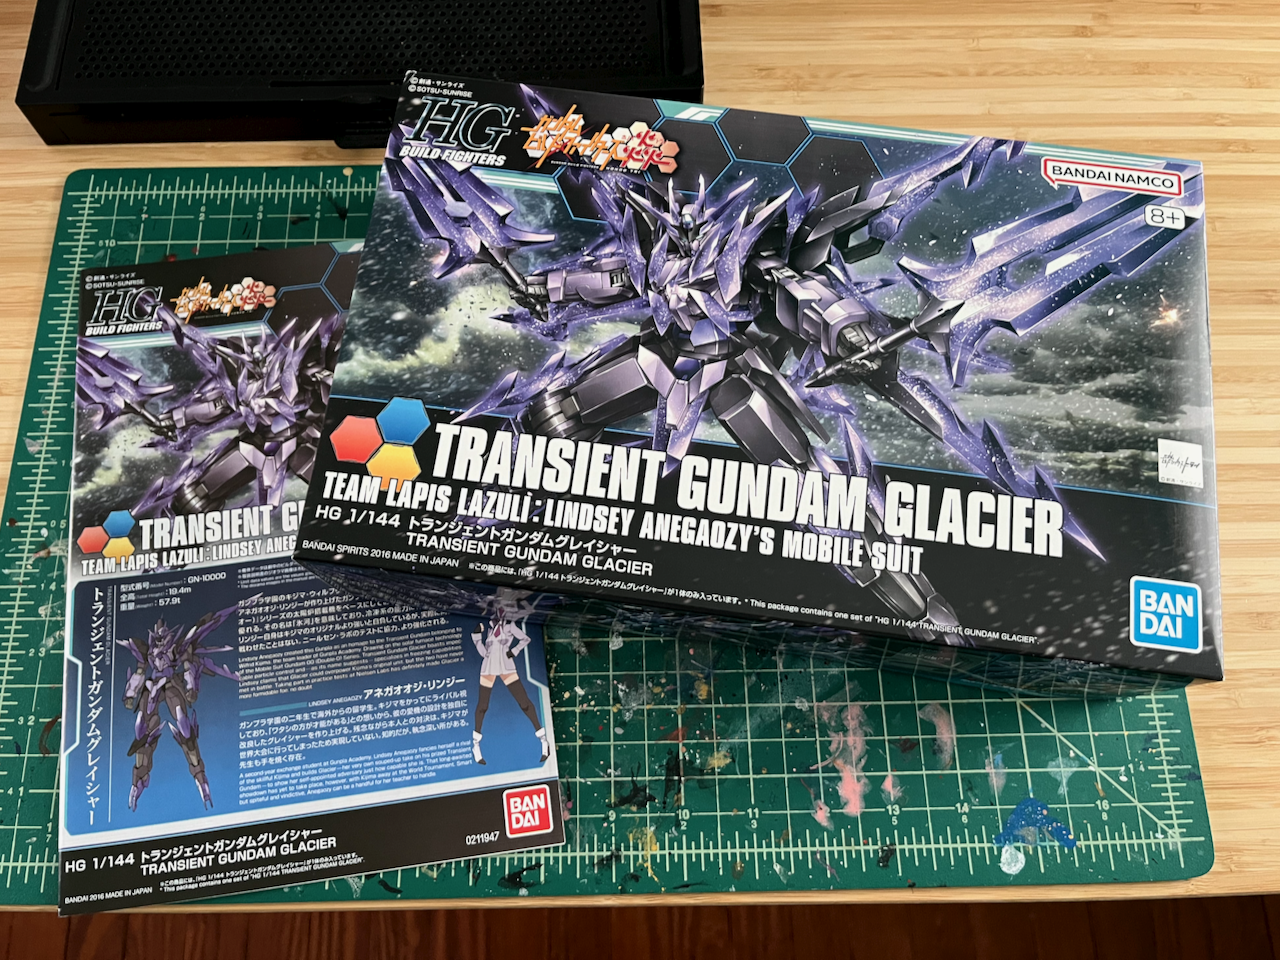
HGBF Transient Gundam Glacier!

This mobile suit comes from the rather obscure Gundam Build Fighters Honoo Try, which was serialized in Hobby Japan and is a variant of Transient Gundam from Gundam Build Fighters Try (and yes, Transient Gundam is in my backlog). With its much darker color scheme and additional clear parts, Glacier is strikingly different from your typical Gundam revision. Still, it looks cool, and I thought it would be a good kit to get back into the swing of things.

Working roughly an hour at a time over a few days, I removed most of the pieces from their runners and did the first-pass trimming and filing; just a few optional hands, some backpack parts, and all of the weapon parts haven’t been touched yet. This whole process has been the same as usual, save for one addition: a DSPIAE handheld vacuum cleaner. I’ve been mainly using this vacuum to clean the dust off of my files, which it does a great job of, though I still have to use tape to remove those few particles that really get stuck. This vacuum has also been good for keeping my workspace a little bit cleaner. So far, I’ve gotten my money’s worth.

Testing some paint on the main (opaque) runners for this kit

Right now, I’m in the process of wiping down the pieces with wet paper towels and testing some paint colors. Said tests are for the panel lines; for this kit, I wanted to do something out of the ordinary. I’ve tested six colors so far, including a green that I originally bought to paint Gundam eyes (and for this kit, it will stay that way), and a couple from the Gundam Marker Advanced set (both of which were too dark). I really like the yellow, but it would pop too much on Glacier, reducing the visual impact of the clear parts. That said, between the last two colors, light blue and light pink, I’m leaning towards the former, since it fits better with the “Glacier” name. I’m planning on doing a second round of color tests, though, to try and mix the nicest blue I can. Interestingly enough, there’s a teal listed in this Gunpla’s color mixing guide, although it seems to just be for one small detail on the top of Glacier’s head.

So, that’s where I’m currently at with Transient Gundam Glacier. In the following week or so, I plan to finish cleaning, do a final pass on filing and sanding (for the pieces that have already been trimmed, that is), clean some more, then start painting. Going to take my time with this one and hopefully do a nice job.

Build Club Mk.2 – Works in Progress

Thanks to TwoAi, Build Club is back, in newsletter form! The archive, if you want to check it out, is here. What follows is my post for Update 2 for the first round, with the theme of Under Construction

———-

So, I have two in-progress kits right now.

The BB Senshi I will probably never finish

The first is the Koumei Re-GZ SD BB Senshi, which I’ve had on hold for about a year and a half now. My adventures in Gunpla and plamo started many years back with SD Gundams, and specifically BB Senshis, a bunch of which I was able to get for cheap via one of Hobby Search’s sales, back when they were still allowed to sell Gunpla. Even now, I still rely on them for practice and experimentation.

After several years of only building kits every once in a blue moon, I got Serious in 2023, and started off with this BB Senshi, mainly to see how my hand painting was doing and to try out a gold Gundam Marker EX. I didn’t like said marker, mainly because I couldn’t get an even, consistent coat, and wasn’t happy with how the rest of my painting was going, so I boxed up this kit and shifted my attention elsewhere. Haven’t really touched it since, and don’t feel like going back to it anytime soon.

Yin Hu, fully built Suit Type, along with the manual and the Armed Type parts

On the other hand, there’s my second in-progress kit: MS General’s Raider of Shadow Yin Hu. Last year, I built the Suit Type body, which puts her in a waitress outfit, and plan to build the Armed Type body this year. In case you’re wondering, to save space, I collapsed her box and put all the leftover pieces for said Armed Type in a smaller one.

The building of the Suit Type went all right. The manual is one of the best I’ve ever seen, with multiple languages and lists of runners needed for each section, not to mention clear instructions for just about everything. However, the quality of the kit itself is so-so, with obvious seam lines, lower-grade plastic than what’s found in Japanese kits, and nub marks that could be a little better hidden—I had to do quite a bit of touching up on the prepainted silver and gold parts. I mostly like the end result, though, and hope that the Armed Type version doesn’t give me too much trouble later on.

That’s everything for now! Planning to get back into building when the weather warms up, and already have a handful of kits I’d like to tackle. Hopefully one or more of them will match up with the next Build Club theme.